Getting Started
This guide walks you through installing Kitted, completing first-run setup, and activating your licence.
Installation
Download the installer for your platform from the Download page. Kitted is available for Windows, macOS, and Linux.
| Platform | File |
|---|---|
| Windows | Kitted-Setup-x.x.x.exe |
| macOS | Kitted-x.x.x.dmg |
| Linux | Kitted-x.x.x.AppImage or .deb |
Run the installer and follow the prompts. No administrator privileges are required on Windows or macOS. On Linux, make the AppImage executable (chmod +x) and run it directly.
First Launch
When you open Kitted for the first time, you will be taken through a short setup wizard before anything else. This only runs once.
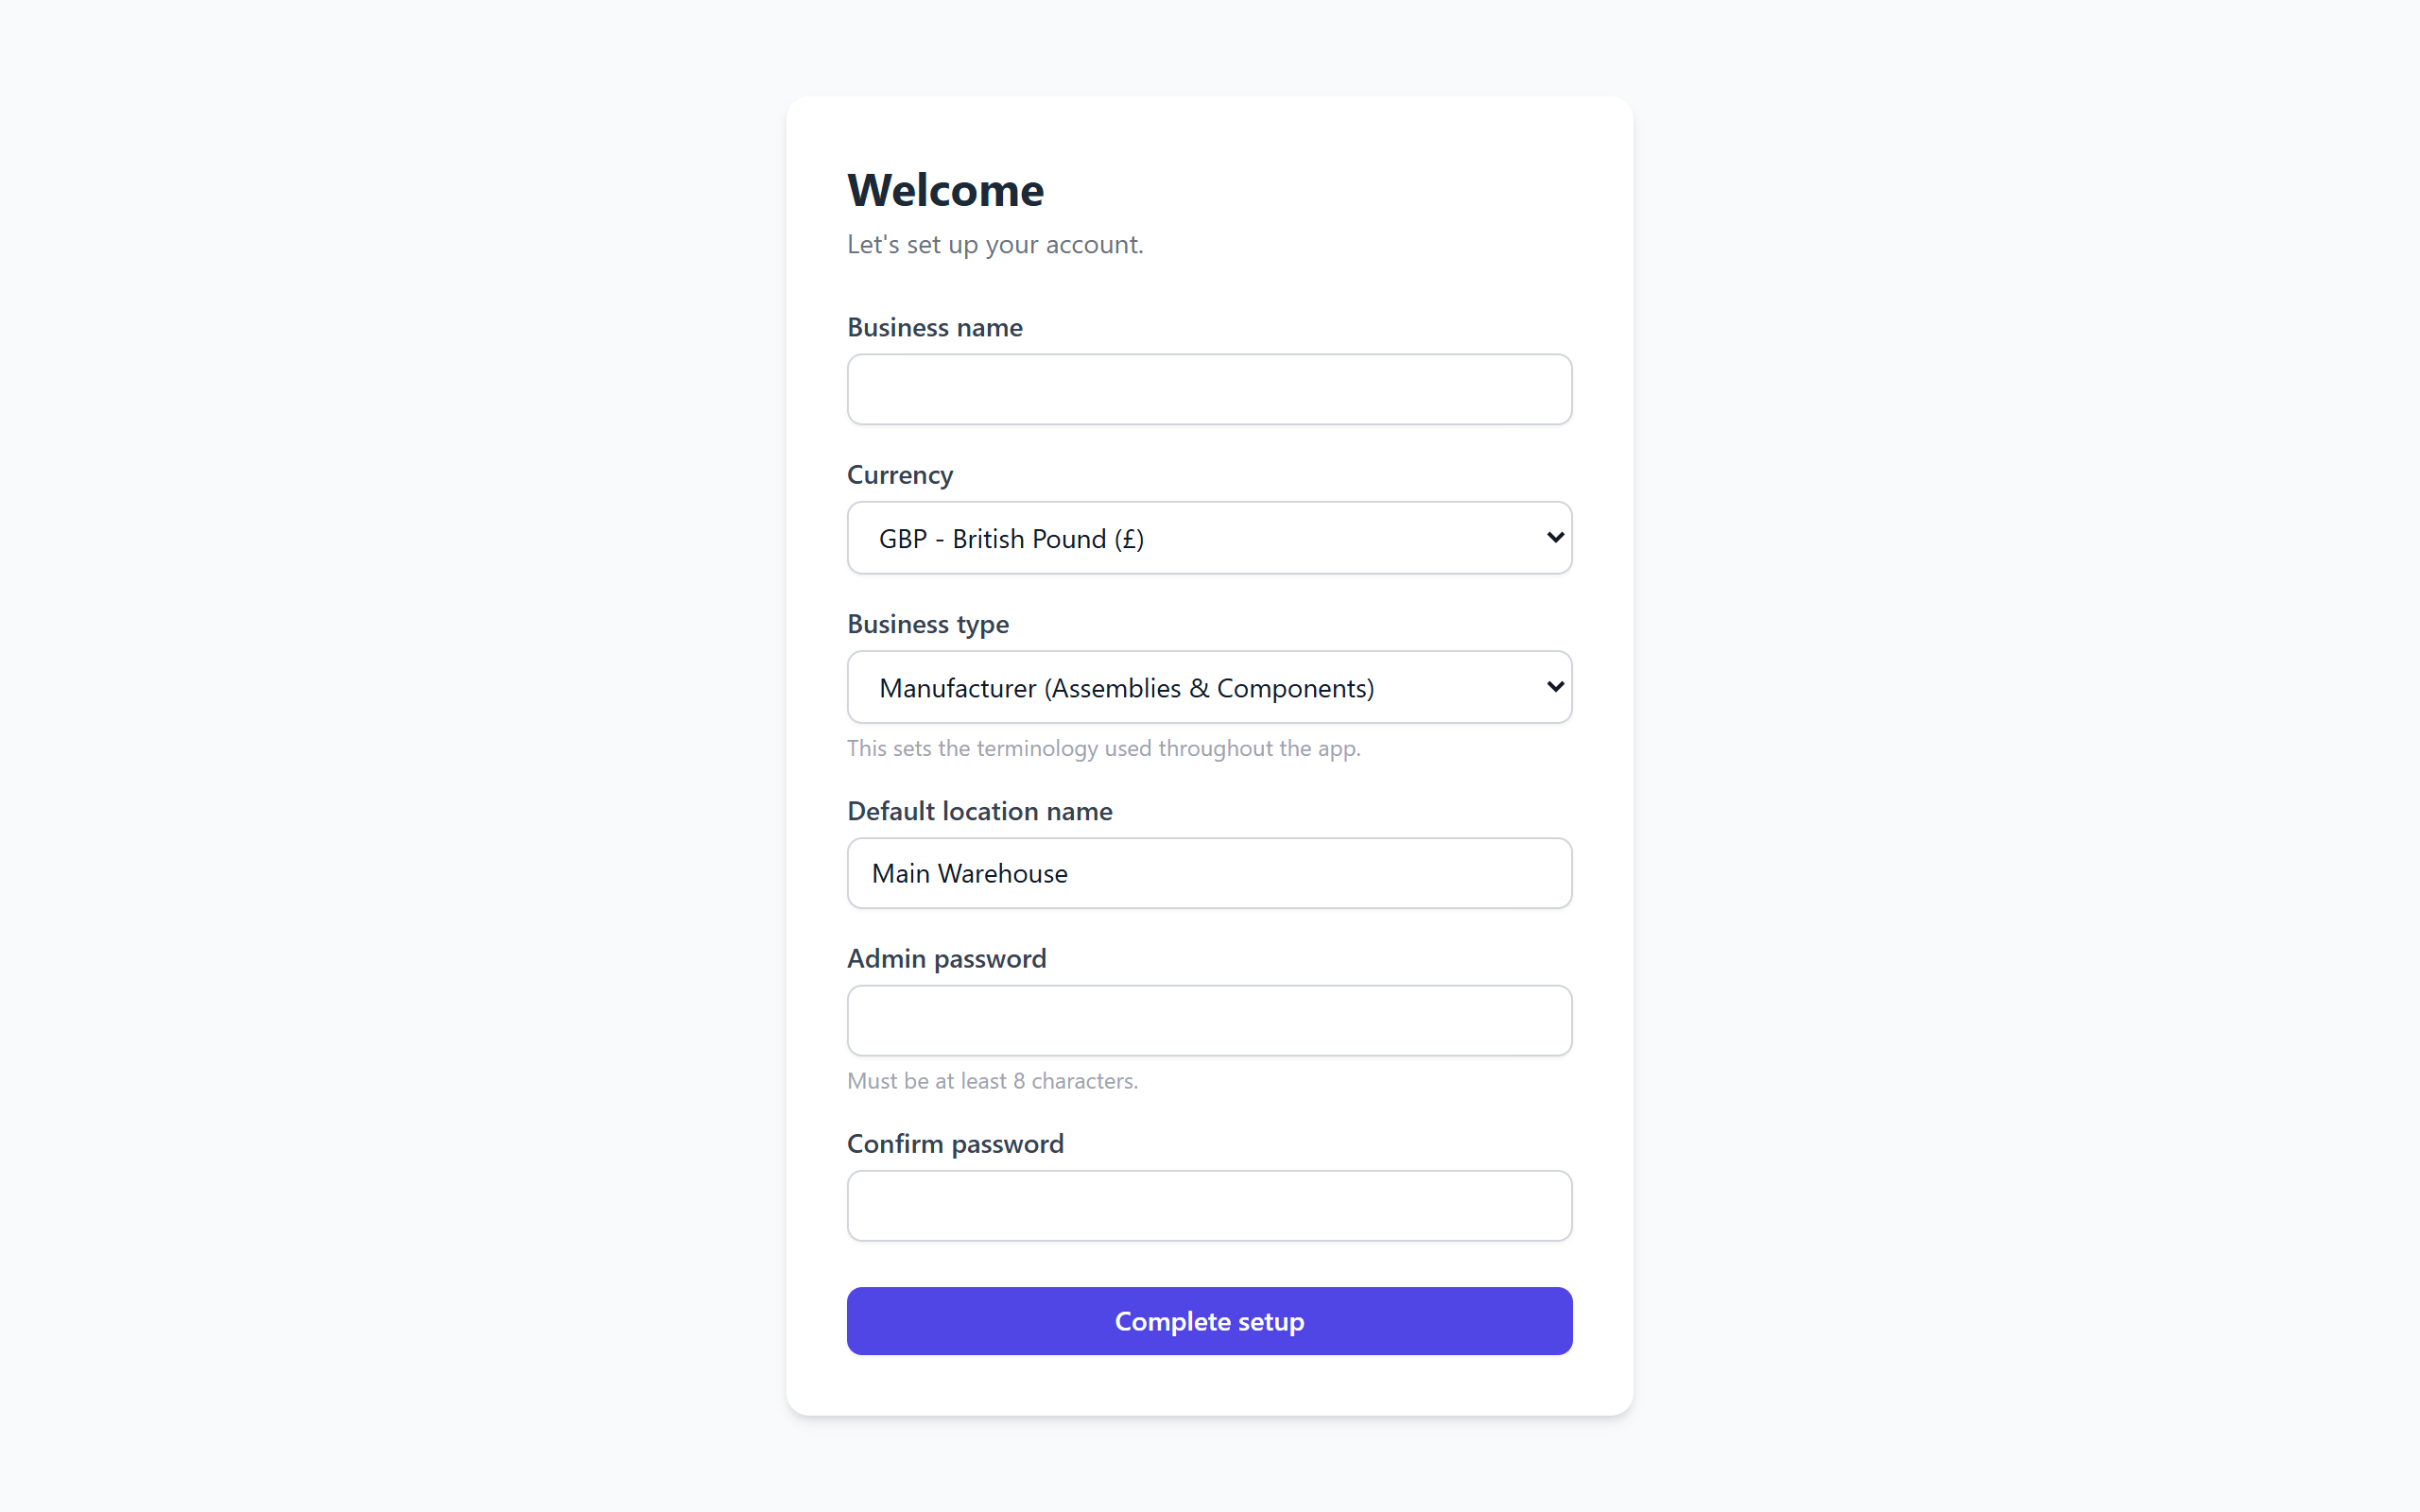
1. Business details
Enter your business name - this appears on the dashboard and in reports. You can change it later in Settings.
Select your currency. This controls how monetary values are formatted throughout the app. Changing the currency after you have entered prices does not convert existing values, so choose the right one now.
Select a business profile. This adjusts some default labels and terminology:
- Manufacturer - general manufacturing, discrete parts (Assemblies & Components)
- Food producer - recipe-based production with batch quantities (Recipes & Ingredients)
- Craft business - handmade goods, mixed batch and one-off production (Formulas & Materials)
2. Default location
Give your first stock location a name, for example Main Warehouse or Workshop. This is where stock will be counted by default. You can add more locations later in the Locations section.
3. Admin password
Set the password for the admin account.
If you’re the only user on this machine: you’ll never see this password again in normal use. Kitted signs you in automatically when you open the app on the machine it’s installed on. The password is only ever asked for when someone connects from another device on your network.
Minimum 8 characters. Keep it somewhere safe if you plan to allow network access.
4. How would you like to start?
After setup completes you will be asked how you want to begin:
- Start from a template - choose an industry-specific starter template to populate your workspace with relevant stock items, assemblies, and suppliers. Templates are a fast way to get a working structure you can customise rather than starting from scratch. Available templates include Lampshade Maker and Candle Maker.
- Load demo data - populates the app with a realistic sample dataset for “Brightwick Co.”, a fictional candle manufacturer, including stock items, bills of materials, suppliers, purchase orders, sales, production orders, stock transfers, stock takes, and lot tracking - so you can explore every part of the app without entering your own data first.
- Start with empty data - begin with a clean workspace and add your own stock items, locations, and suppliers from scratch. You can apply a template or load demo data at any time from Settings.
Demo data can be wiped later from Settings - Data.
Your Data Directory
Kitted stores everything - the database, backups, and attachments - in a single folder on your machine. The default location is:
| Platform | Default path |
|---|---|
| Windows | %APPDATA%\kitted |
| macOS | ~/Library/Application Support/kitted |
| Linux | ~/.local/share/kitted |
You can change this from Settings → Data Directory. The app will offer to copy your existing data to the new location. See Data Directory for full details.
Activating Your Licence
Kitted runs in trial mode until you activate a licence key. In trial mode all features are available, but a banner is shown as a reminder.
To activate:
- Go to Settings → Licence
- Paste your licence key into the field and click Activate
- The app contacts the licence server to validate the key and register this machine
Activation requires an internet connection. Once activated, normal use is fully offline - the app only contacts the licence server for periodic check-ins in the background.
If you need to move Kitted to a new machine, deactivate on the old machine first via Settings → Licence → Deactivate, then activate on the new machine. See Licence Activation for more detail.
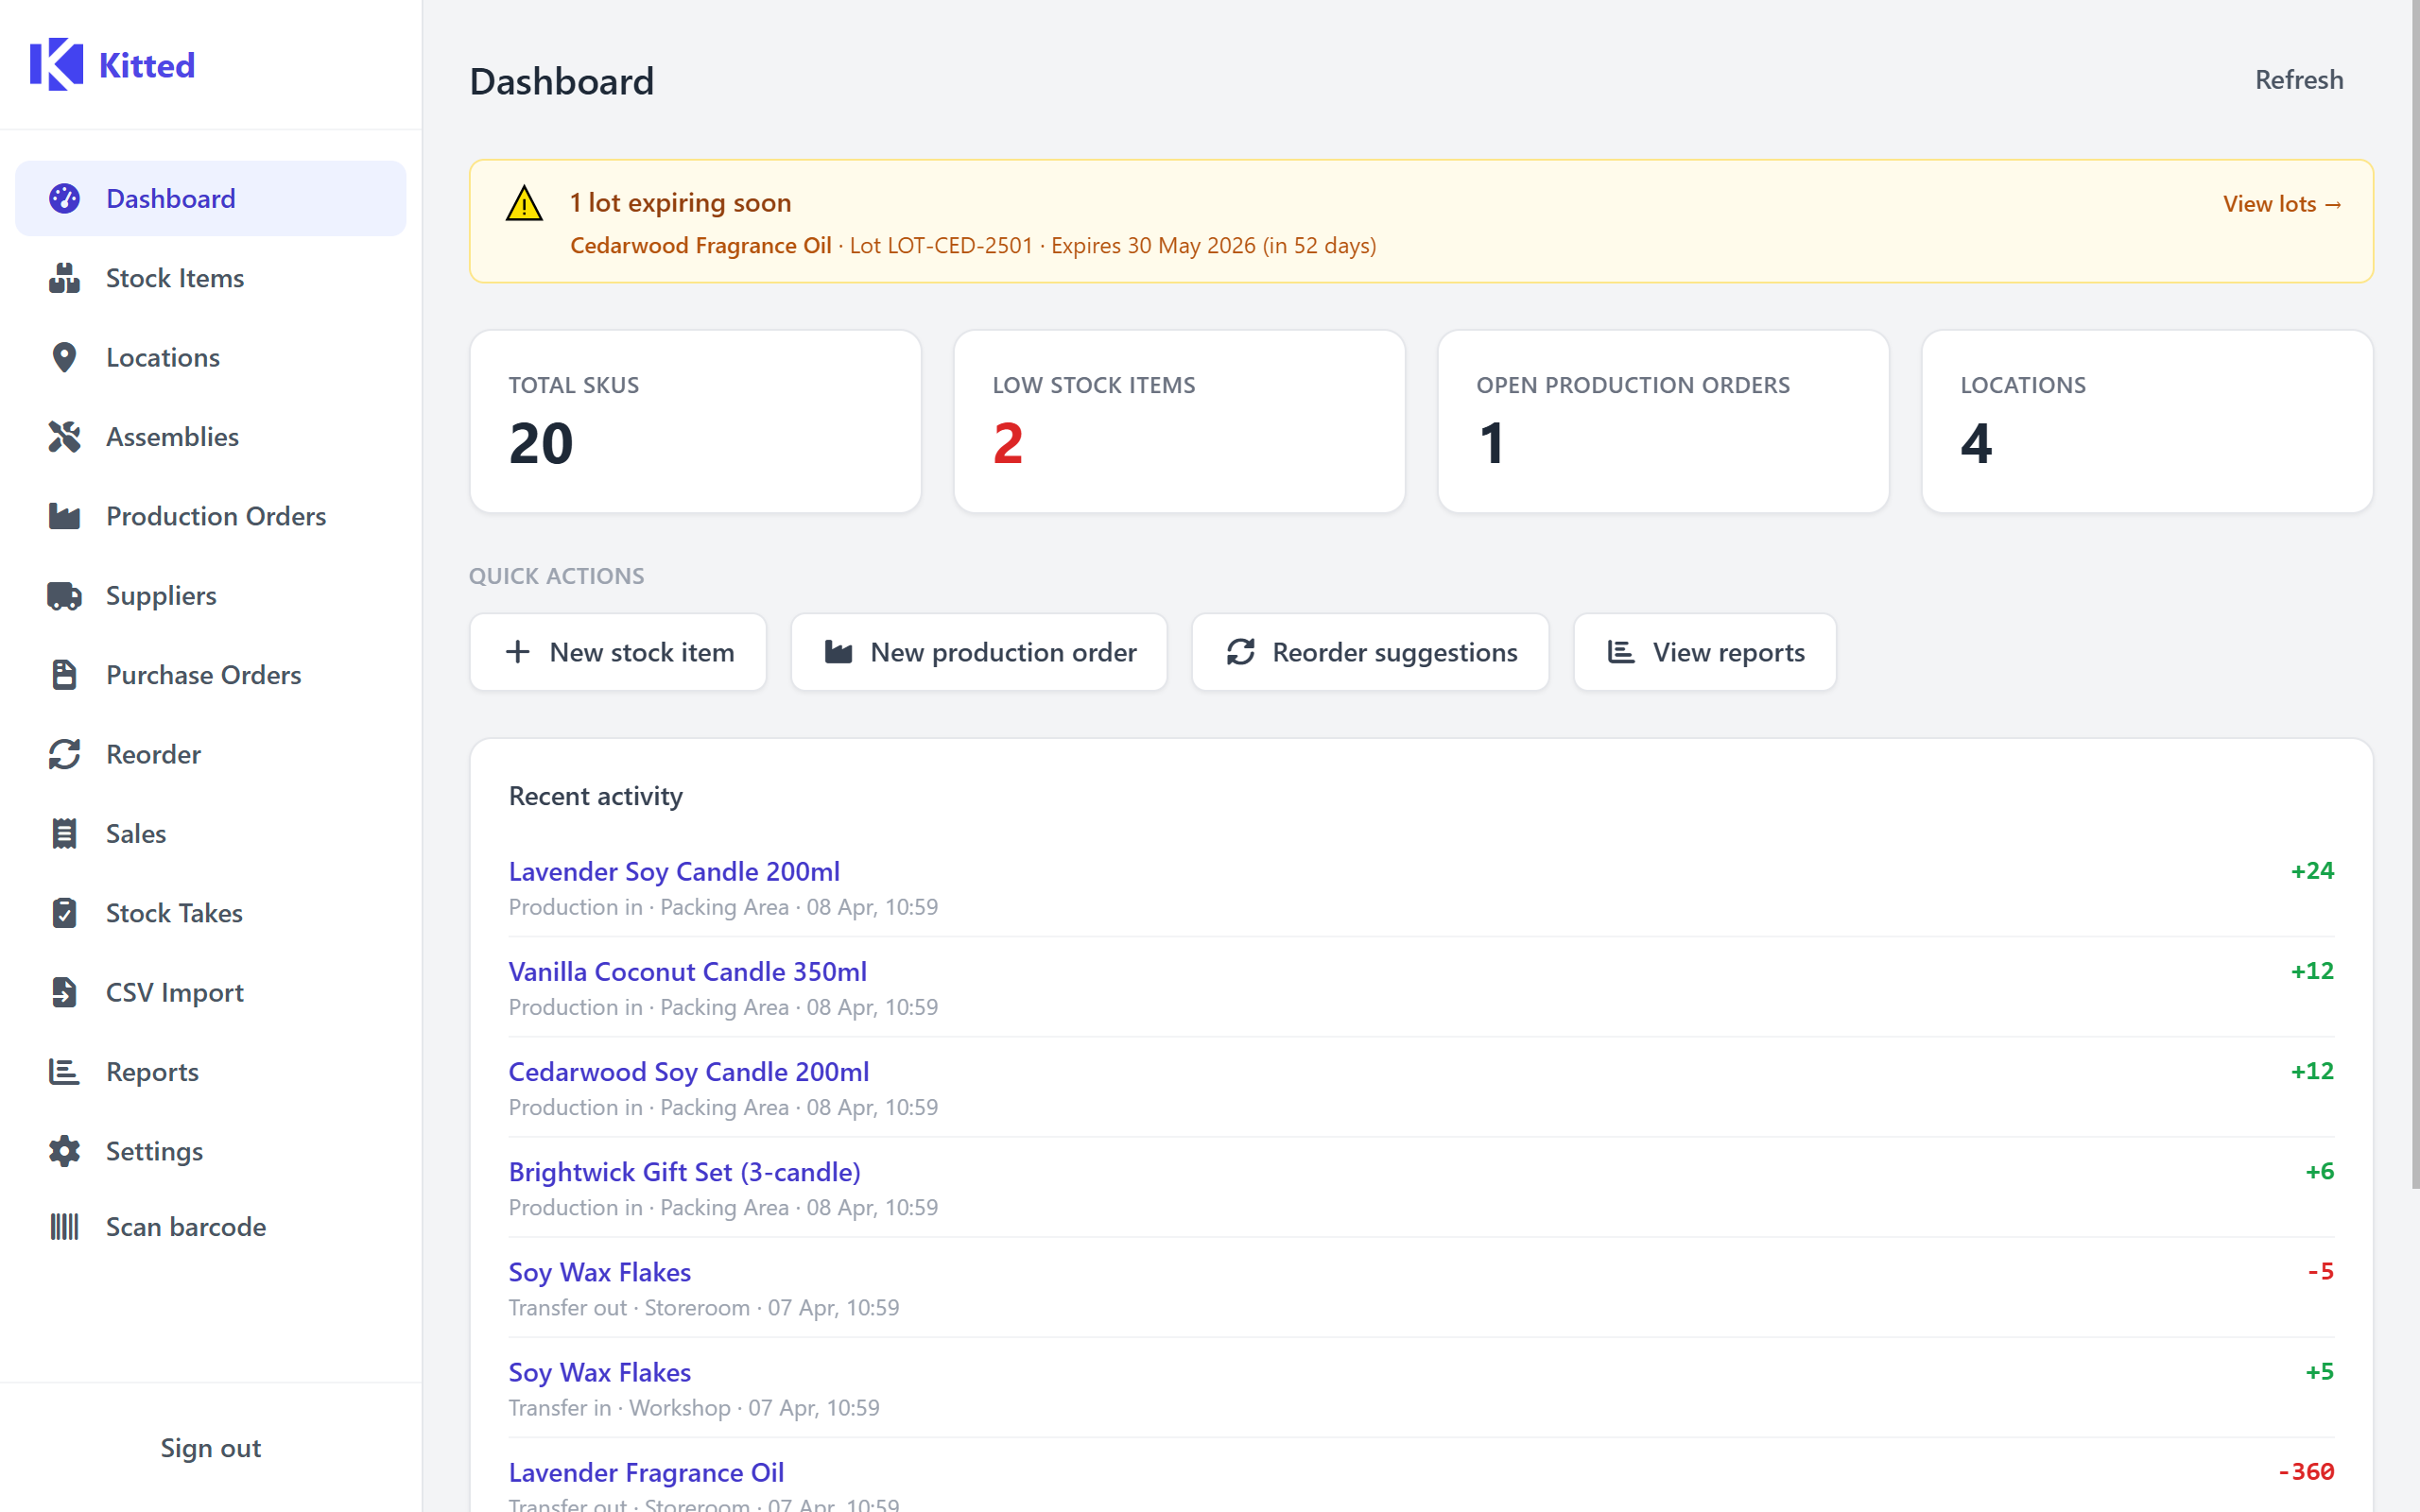
The Dashboard
Once setup is complete you will land on the Dashboard. It gives you an at-a-glance overview of your business and quick access to the most common actions.
Setup Checklist
If you are just getting started, a checklist banner is shown at the top of the dashboard with four recommended steps:
- Create at least one location
- Add your first stock item
- Set a minimum stock level on a stock item
- Link a supplier to a stock item
Each item links directly to the relevant section. The checklist disappears once all four steps are complete.
Expiring Lots Banner
If you use lot tracking and any lots are approaching or past their expiry date, a warning banner is shown listing up to five affected lots. Click View lots → to open the Lot Traceability report. See Lot Tracking for more detail.
Summary Cards
Four summary cards give you a snapshot of current status:
| Card | What it shows |
|---|---|
| Total SKUs | Number of active (non-archived) stock items. Clicking navigates to the Stock Items list. |
| Low stock items | Number of items where total stock across all locations is below the item’s minimum stock level. Shown in red when greater than zero. Clicking navigates to the Reorder Workbench. |
| Open production orders | Number of production orders not yet completed or cancelled. Clicking navigates to Production Orders. |
| Locations | Number of active stock locations. Clicking navigates to the Locations list. |
Quick Actions
Four shortcut buttons beneath the summary cards let you jump immediately to the most common tasks:
- New stock item - opens the Stock Items list ready to create a new item
- New production order - opens the Production Orders list ready to create an order
- Reorder suggestions - opens the Reorder Workbench
- View reports - opens the Reports page
Recent Activity
The Recent activity feed shows the last 10 stock movements across all items and locations. Each row shows the item name (linking to its detail page), the movement type, location, and date/time. Quantity changes are colour-coded - green for additions, red for reductions.
Movement types shown include: Adjustment, Transfer in/out, Production in/out, and Receipt (purchase).
Click Refresh in the page header to reload all dashboard data.
What’s Next
A good starting point is to add your stock items - head to Stock Items and either add them one by one or use the CSV Import to bulk-load from a spreadsheet.
Once you have data you care about, set up automatic backups in Settings → Backup so you always have a recent copy of your database. See Backup and Restore for details.